Phase 1: Planning and Preparation
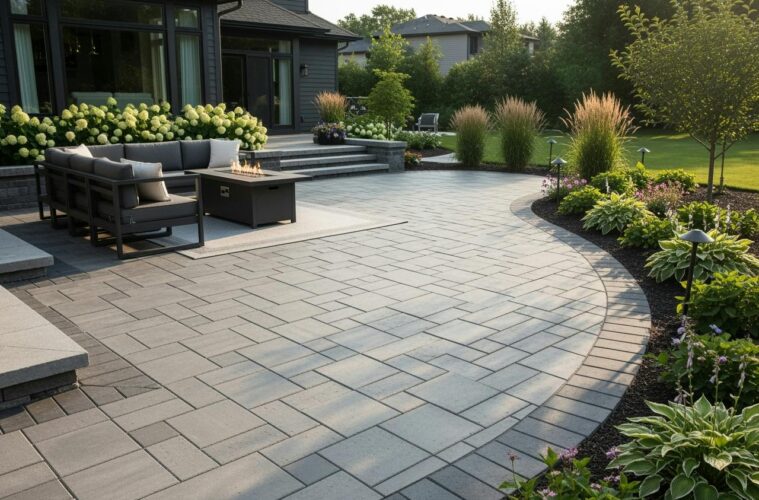
Imagine changing your outdoor space into a beautiful and functional area. EP Henry pavers are a top choice for creating stunning patios, walkways, and driveways.
Known for their durability and ability to handle tough weather, they are a smart
investment for your home. But getting a great finished look depends on proper
installation.
In this step-by-step guide, we will walk you through the entire process. We will cover initial planning, essential materials, and the hands-on techniques for laying and finishing your new surface. Our goal is to make your DIY paver project straightforward and successful.
The success of any EP Henry paver installation hinges on meticulous planning and preparation. This initial phase lays the groundwork, ensuring your project meets local regulations, remains safe, and stands the test of time. Skipping these crucial steps can lead to costly mistakes and a less-than-satisfactory outcome.
Legal, Safety, and Design First
Before any digging begins, it’s imperative to address legal and safety considerations. These steps protect you, your property, and your investment.
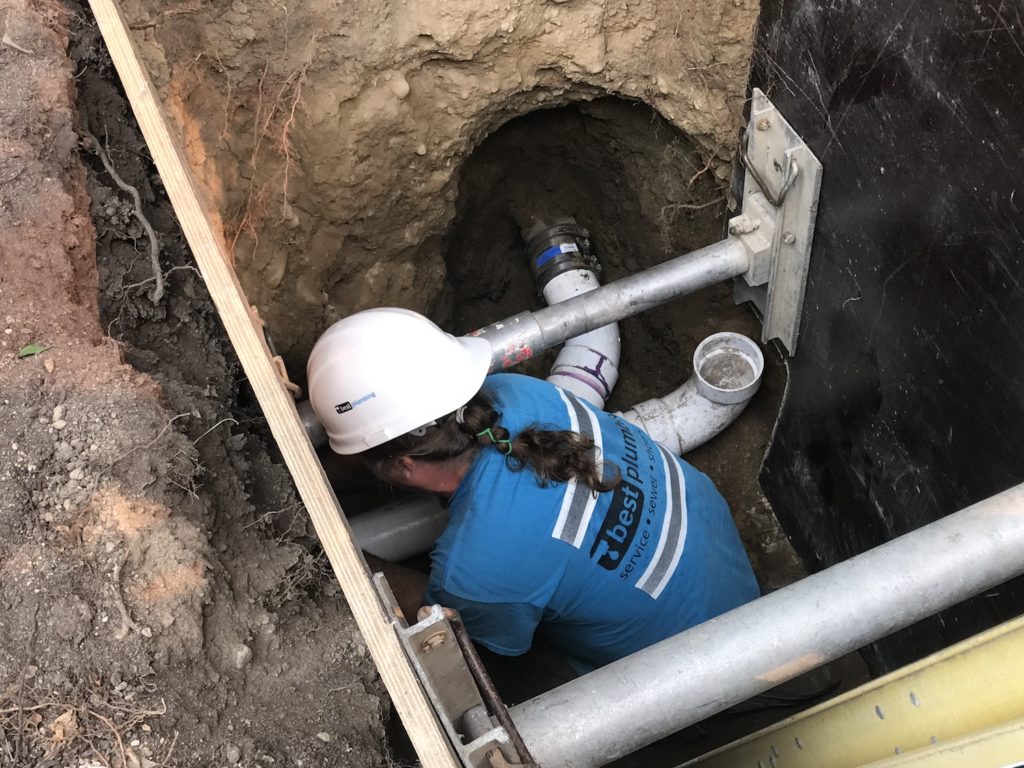
First and foremost, call 811 a few days before you plan to excavate. This free national service notifies local utility companies to mark the location of underground lines (gas, electric, water, sewer, communication). Digging without knowing where these lines are can lead to dangerous and expensive accidents. It’s a legal requirement in most areas and a critical safety measure.
Next, check with your local municipality for any construction permits required for your project. Depending on the size and scope of your paver installation, you may need a permit, especially if it involves significant excavation, drainage changes, or structures like retaining walls. Ignoring permit requirements can result in fines or the forced removal of your newly installed hardscape. Similarly, if you live in a community governed by a Homeowner’s Association (HOA), review their HOA rules regarding outdoor modifications. Many HOAs have specific guidelines on materials, colors, and designs for hardscaping projects.
Safety gear is non-negotiable throughout the entire installation process. We
recommend wearing heavy-duty gloves to protect your hands from abrasions and
blisters, and safety glasses to shield your eyes from flying debris, especially when
cutting pavers. Hearing protection is also advised when operating power tools like plate compactors or wet saws. For tasks involving dust (e.g., cutting dry or sweeping polymeric sand), a NIOSH-Approved respirator is essential to protect your lungs.
Finally, dedicate ample time to project layout and design. Sketch your project with
precise dimensions, considering the intended use of the space. Will it be a patio for entertaining, a walkway leading to a garden, or a driveway for vehicles? This influences the required base depth and paver type. Mark the perimeter of your project area with stakes and string line. This visual guide helps confirm the size and shape before excavation. Crucially, plan for proper drainage slope. Water must drain away from your home’s foundation and other structures. A recommended slope is 1/4 inch per foot (or 2%) of fall. For example, an 8-foot wide patio should have a 2-inch drop from one side to the other. You can achieve this by setting your string lines at the correct elevation. The quality of your base dictates how well the patio or walkway surface will retain its form, making proper grading fundamental.
Essential Tools for EP Henry Paver Installation
A successful EP Henry paver installation requires a specific set of tools. While some can be rented, owning others will make the job much smoother. Here’s a
comprehensive list of what you’ll need:
Measuring and Marking Tools:
o Tape Measure: For precise measurements of your project area and material
cuts.
o Level: A long level (4-6 feet) is crucial for checking the grade of your
excavation, the levelness of your base, and the evenness of your sand setting
bed.
o String Line and Stakes: Essential for marking your project perimeter,
establishing precise grades, and ensuring straight paver lines.
o Marking Paint or Landscape Paint: For outlining your design directly on the
ground.
Excavation and Base Preparation Tools:
o Shovel and Spade: For digging and moving excavated soil and base
materials.
o Wheelbarrow: Indispensable for transporting soil, gravel, and sand.
o Landscape Rake: For spreading and leveling base materials and sand.
o Hand Tamper or Plate Compactor: A hand tamper is suitable for small,
confined areas, but for any project over 100 square feet, a gas-powered plate
compactor is highly recommended. It provides superior compaction, which is
vital for a stable, long-lasting paver surface. You can typically rent these from
equipment rental stores.
o Electrical Conduit (1-inch diameter) or Metal Pipes: Two pieces of 1-inch
diameter electrical conduit are excellent for use as screed guides to ensure a
consistent 1-inch sand setting bed.
Paver Laying and Cutting Tools:
o Rubber Mallet: For gently tapping pavers into place and adjusting their
position.
o Masonry Saw (Wet Saw with Diamond Blade): Essential for cutting pavers
to fit edges, curves, or intricate patterns. A wet saw minimizes dust and keeps
the blade cool. Ensure you have extra diamond blades on hand. For larger
projects, a paver splitter can also be useful for straight cuts.
o Chisel and Hammer: For minor adjustments or breaking off small pieces after
scoring with a saw.
o Push Broom: For sweeping joint sand into the paver gaps.
Safety and Finishing Tools:
o Safety Glasses and Gloves: As mentioned, mandatory for personal
protection.
o Respirator: Especially important when cutting pavers or sweeping polymeric
sand.
o Garden Hose with Spray Nozzle: For activating polymeric sand.
o Protective Mat or Fabric: A piece of geotextile fabric or a rubber mat to place
between the plate compactor and the pavers during final compaction,
preventing scuffing or damage to the paver surface.
Having these tools ready before you start will streamline your EP Henry paver
installation and ensure a professional finish.
Calculating Materials and Estimating Costs
Accurately calculating materials is key to staying on budget and avoiding delays. We recommend adding 3-5% to material quantities for cuts and waste during EP Henry paver and wall installations.
1. Pavers: First, measure the total square footage of your project area (length x width). EP Henry offers a wide variety of paver sizes and shapes. Once you’ve chosen your specific paver, you’ll need to determine how many pavers cover one square foot. Your supplier or the EP Henry product catalog will provide this information. Multiply your total square footage by the number of pavers per square foot, then add your 3-5% waste factor for cuts and overage. For example, if you have a 200 sq ft patio and your chosen paver covers 2.5 pavers per sq ft, you’d need 500 pavers, plus 15-25 for waste.
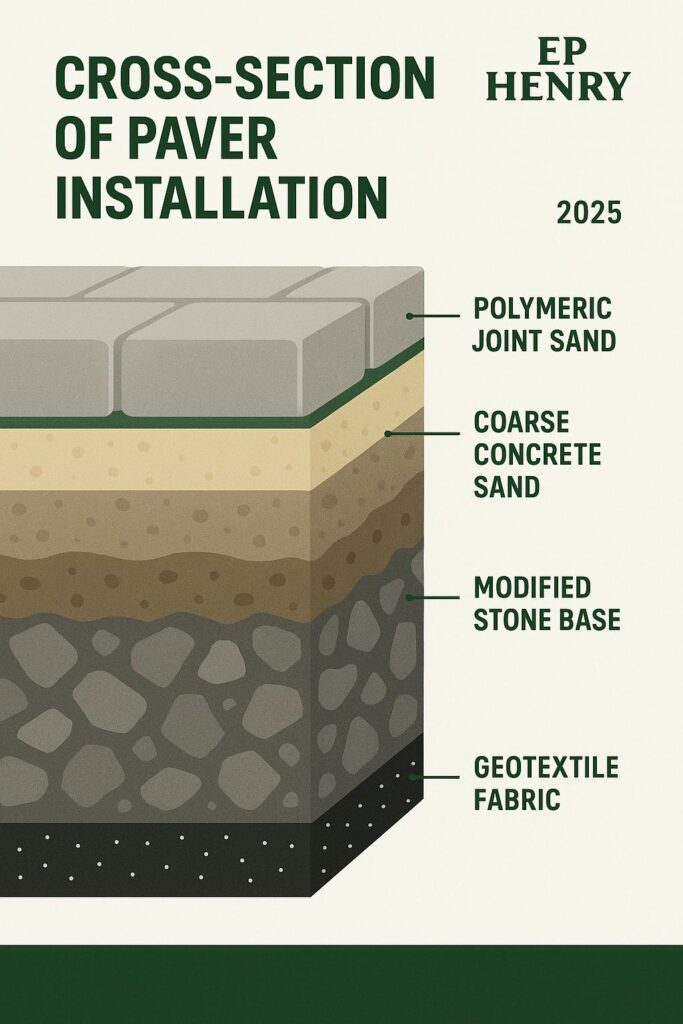
2. Modified Stone Base (Crusher Run / 2A): This forms the crucial foundation. For walkways and patios, a minimum of 6 inches of compacted modified stone base is recommended. For residential driveways supporting light vehicles, you’ll need 10-12 inches. To calculate the volume, multiply your square footage by the desired compacted base depth (in feet). Then, convert this cubic footage to tons. A general rule of thumb is that one ton of modified stone covers approximately 100 square feet at a 2-inch thickness. So, for a 6-inch base, you’d need about 3 tons per 100 square feet. Remember to extend your base material 6 inches beyond the finished paver dimensions for proper edge support.
3. Coarse Concrete Sand (Bedding Sand): This 1-inch thick layer sits directly beneath your pavers. One ton of coarse concrete sand will cover approximately 100 square feet at a 1-inch thickness. Ensure you specify “coarse concrete sand” when ordering, as stone dust or screenings are not suitable for this layer.
4. Polymeric Joint Sand: This specialized sand, when activated with water, hardens to lock pavers in place, inhibit weed growth, and deter insects. EP Henry Polysand (joint sand stabilizer) covers approximately 75 square feet for standard pavers and 45 square feet for tumbled (Coventry) pavers. You’ll need to sweep this into the joints after laying and compacting the pavers.
5. Edge Restraints and Spikes: These are essential to prevent your pavers from
shifting and spreading over time. Measure the linear feet of all exposed edges of your paver area. Edge restraints typically come in lengths of 7.5 to 8 feet. You’ll also need spikes (often 8-10 inches long) to secure the restraint to the base. A common ratio is one spike per 1.5 linear feet of edge restraint.
6. Geotextile Separation Fabric: While not always included in basic material lists, a geotextile separation fabric (like Mira® 500x) is an inexpensive insurance policy. It’s laid over the compacted subgrade to prevent the base material from mixing with the underlying soil, especially important in clay soils. Calculate this based on your project’s square footage, adding 10% for overlap.
DIY Cost Example: The cost of an EP Henry paver installation can vary significantly based on project size, material choices, and whether you DIY or hire a professional. For a DIY project, you’re primarily looking at material costs and tool rentals.For instance, a 525 sq ft paver patio project, including pavers, wall materials, lighting, poly sand, edge restraint, adhesive, stone base, and sand, might cost around $6,000 for materials. Tool rentals (skid steer, plate compactor, cut-off saw) could add another $800. This brings the total DIY cost for a substantial project to approximately $6,800-$7,500, offering significant savings compared to professional installation estimates which could be $17,000 or more for a similar scope. This demonstrates the potential for considerable savings when undertaking a large paver patio installation as a DIY project.
Phase 2: The Complete EP Henry Paver Installation Process
Step 1: Excavation and Subgrade Compaction
The foundation of any durable paver installation is a properly excavated and compacted subgrade. This is where we ensure long-term stability and prevent future settling.
First, using your marked layout, begin excavating the area. The total excavation depth will depend on your paver thickness, the depth of your compacted base, and the 1-inch sand setting bed. For example, if you're using a standard 2 3/8-inch thick paver and require a 6-inch base for a patio, your total excavation depth will be approximately 2 3/8 inches (paver) + 1 inch (sand bed) + 6 inches (base) = 9 3/8 inches. Always excavate approximately 6 inches wider than your planned paver area on all sides to provide ample room for edge restraints and base support.
As you excavate, ensure you maintain the planned 1/4-inch per foot slope for
drainage. This means the lowest point of your excavation should be 1/4 inch lower for every foot of distance from the highest point. Use your string lines and a level to verify this slope consistently across the entire area. Proper grading here is critical to prevent water from pooling on your finished patio or seeping towards your home’s foundation.
Once the excavation is complete, it’s time for compacting the subgrade soil. This is the natural soil beneath your project. Use your plate compactor (or hand tamper for small areas) to compact the entire excavated surface. Make multiple passes in perpendicular directions (e.g., North-South, then East-West) to achieve maximum density. The goal is a firm, unyielding surface. If the soil is very dry, lightly moisten it before compacting to aid in consolidation.
After compacting the subgrade, lay down your geotextile separation fabric. This fabric acts as a barrier, preventing the underlying soil from mixing with your imported base material over time, which can lead to settling and unevenness. Lay the fabric smoothly over the entire excavated area, overlapping seams by at least 12 inches. Extend the fabric up the sides of your excavation to contain the base material.
Step 2: Building the Foundation
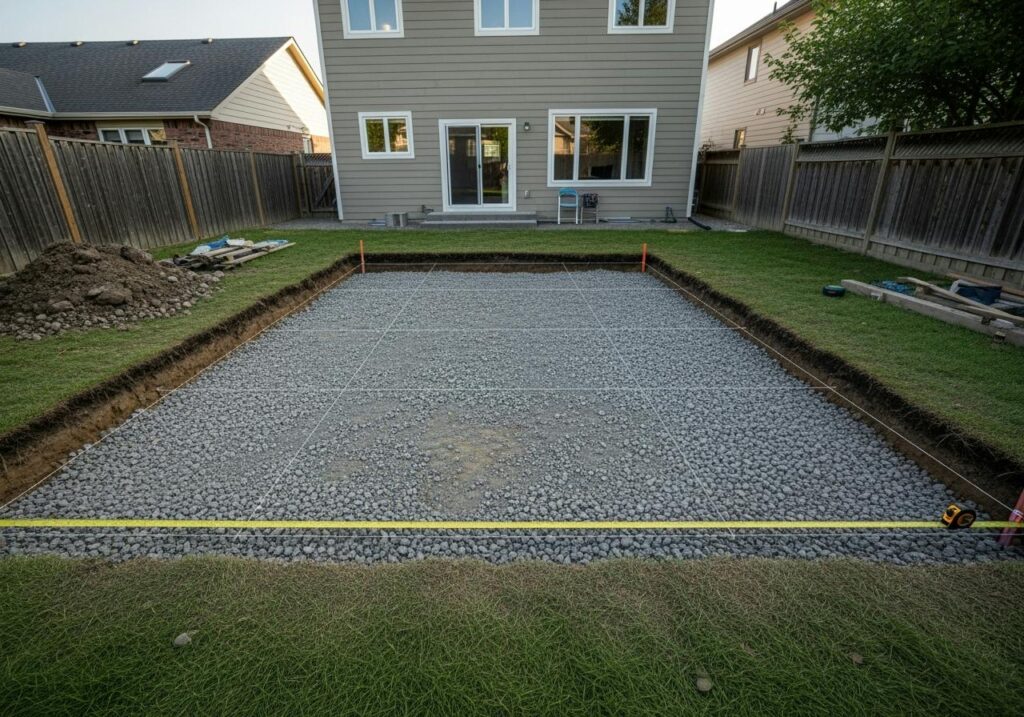
Begin by bringing in your modified stone base (also known as crusher run or 2A
modified stone). Spread the stone in uniform 2-inch lifts (layers) across the entire
excavated area. The key here is to build up the base in these thinner layers, rather than trying to compact one thick layer. This allows for optimal compaction and prevents future settling.
After spreading each 2-inch lift, thoroughly compact each layer using your plate
compactor. Make multiple passes over the entire surface until the stone is tightly
interlocked and firm. If the stone is excessively dry, a light misting with water can aid in compaction. Repeat this process, adding and compacting 2-inch lifts, until you reach your desired total base depth (e.g., 6 inches for a patio, 10-12 inches for a driveway). Remember to maintain your drainage slope throughout this process.
Once your stone base is fully compacted and graded, it's time to prepare the 1-inch sand setting bed. This layer provides a precise, level surface for your pavers to rest on. Lay two pieces of 1-inch electrical conduit or metal pipes parallel to each other on top of the compacted stone base, spaced slightly less than the length of your 2×4 screed board. These act as your screed guides.
Carefully spread your coarse concrete sand over the base, filling the area between the guides. Using your 2×4 board, pull it across the top of the conduit pipes, pushing excess sand forward. This process, called screeding, creates a perfectly uniform 1-inch sand setting bed. Do not compact this sand layer before laying pavers; the pavers themselves will compact it during the final compaction step. Once an area is screeded, carefully remove the conduit and fill the small channels with loose sand, smoothing it with a trowel or hand. Avoid walking on the screeded sand.
Step 3: Laying the Pavers
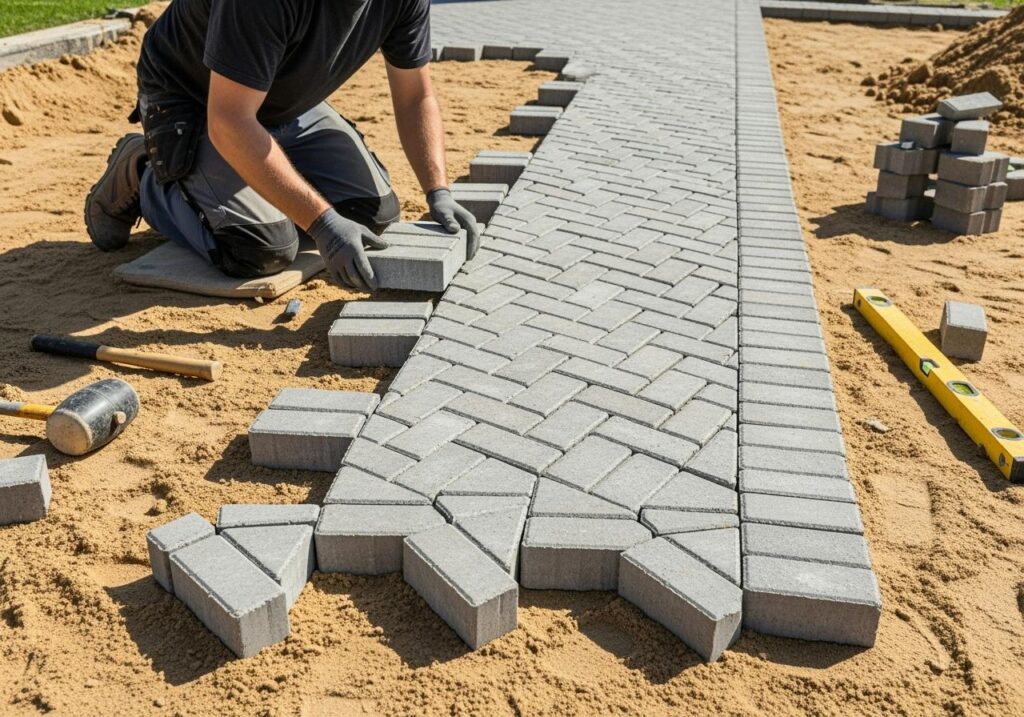
Now comes the most visually rewarding part of your EP Henry paver installation: laying the pavers. Precision and attention to detail here will ensure a beautiful and functionalsurface.
When laying pavers, always start at a 90-degree corner or a permanent edge (like a house foundation). This provides a stable reference point and helps ensure your lines remain straight. If you’re working with a specific pattern, such as a herringbone pattern (recommended for driveways due to its interlocking strength), plan your starting point carefully to accommodate the pattern's flow.
As you lay each paver, place pavers straight down onto the sand setting bed. Avoid
sliding or dragging them, as this can disturb the perfectly screeded sand layer beneath. Gently wiggle each paver into position to ensure full contact with the sand.
Periodically, check your alignment using string lines for alignment. Run string lines perpendicular to your starting edge every few feet. As you lay rows, ensure theedges of your pavers align perfectly with these strings. This helps maintain straight lines and a consistent pattern across your entire project. For larger pavers or those with specific patterns, a rubber mallet can be used to gently tap them into place and ensure they are seated properly.
You will inevitably need to cut pavers to fit edges, curves, and around obstacles. For most cuts, a wet saw with a diamond blade is the most efficient and precise tool. Always wear safety glasses and a respirator when cutting. Mark your cut lines clearly on the paver, then carefully guide it through the saw. For intricate curves or small pieces, a paver splitter or a hammer and chisel (after scoring with a saw) can also be used, though a wet saw provides the cleanest finish. Remember your 3-5% waste factor for these cuts.
Step 4: Finishing and Securing Your Project
First, install your edge restraint. This is a critical component that prevents your pavers from migrating or spreading outwards over time. Position the edge restraint along all exposed edges of your paver installation. Secure it firmly to the compacted base using long spikes (typically 8-10 inches) driven through the restraint’s pre-drilled holes. Ensure the restraint is flush with or slightly below the top of the pavers so it won’t be a tripping hazard or visible once the project is complete.
Next, it’s time for the initial compacting pavers with protective mat. Before applying joint sand, you need to “seat” the pavers into the sand setting bed. Place a protective mat (such as a piece of geotextile fabric, an old carpet remnant, or a rubber mat) over a section of your newly laid pavers. Then, run your plate compactor over the mat, making several passes. This process vibrates the pavers, causing them to settle firmly into the sand bed and achieve their final interlock. The protective mat prevents scuffing or chipping the paver surface, especially important for textured or profiled pavers.
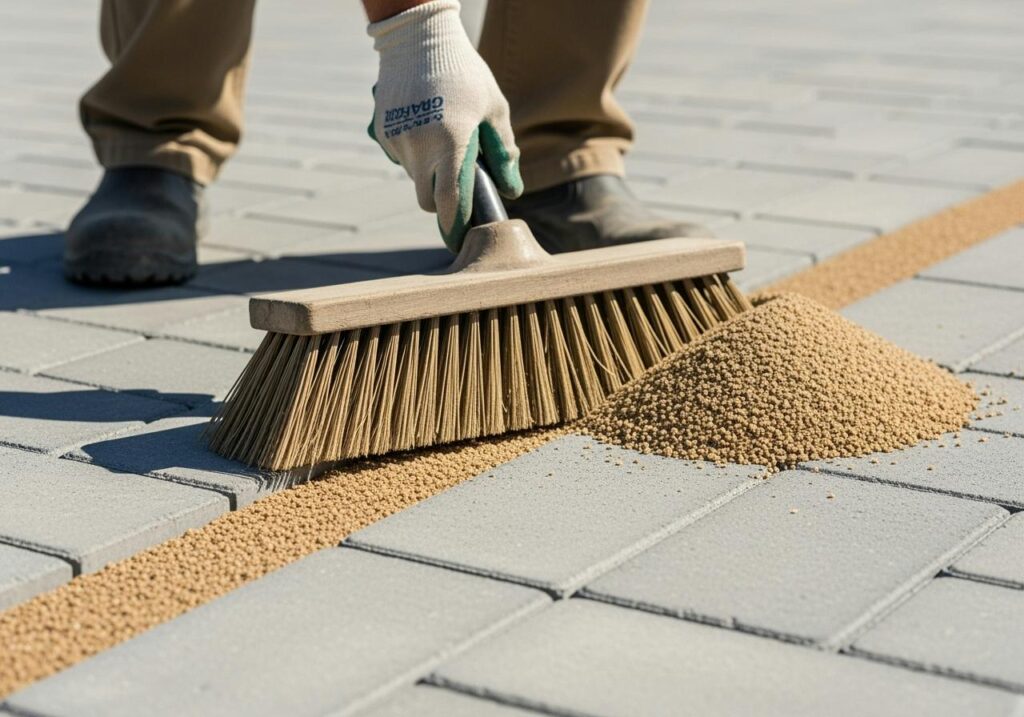
After compaction, begin sweeping in joint sand. Spread a generous layer of fine, dry joint sand (or polymeric sand) over the entire paver surface. Use a stiff push broom to vigorously sweep the sand into all the joints between the pavers. Ensure every joint is completely filled.
For the best long-term results, we highly recommend using polymeric sand. This
specialized sand contains polymers that, when activated with water, bind together to form a firm, durable joint. Once all joints are filled, make one final pass with the plate compactor (with the protective mat) to vibrate the sand deeper into the joints. This ensures maximum fill and interlock. Sweep off any remaining excess sand from the surface.
Finally, it’s time for activating polymeric sand. Carefully read the manufacturer’s instructions for your specific polymeric sand product, as activation methods can vary slightly. Generally, you will use a garden hose with a fine mist setting to lightly wet the entire paver surface. The goal is to thoroughly saturate the sand in the joints without washing it out or leaving standing water on the paver surface. Work in small sections, misting until the joints appear wet and the sand consolidates. Allow the polymeric sand to cure for the recommended time (usually 24-48 hours, depending on temperature and humidity) before walking on or using the surface. This final step locks your EP Henry pavers firmly in place, creating a stable, weed-resistant, and beautiful hardscape that will last for years.
Avoiding Common Pitfalls for a Lasting Patio
One of the most frequent mistakes is improper base compaction. If the subgrade and stone base are not compacted thoroughly and in thin lifts, the pavers will inevitably settle unevenly over time, leading to dips and humps. This is often the primary cause of paver failure. Similarly, failing to establish the correct incorrect slope for drainage can lead to standing water on your patio, which not only looks bad but can also cause issues with efflorescence, moss growth, and in freezing climates, can damage the pavers or the base.
Another common oversight is forgetting edge restraints or installing them improperly. Without proper edge restraint, your pavers will gradually shift and spread outwards, compromising the integrity of the entire system. This can lead to wide gaps, tripping hazards, and a general breakdown of the paved surface.
Rushing the application of rushing polymeric sand is another pitfall. If the sand is
applied when wet, or if it’s not thoroughly swept into the joints and compacted before activation, it won’t bind properly. This can lead to weak joints, allowing weeds to grow and sand to wash out. Additionally, over-watering polymeric sand during activation can a milky haze on the paver surface.
Finally, uneven screeding of the sand setting bed will result in an uneven paver
surface. The 1-inch sand layer must be perfectly consistent across the entire project to ensure that all pavers sit at the same height once compacted. Any variations here will be visible in the finished product.
For intricate designs, challenging terrains, or if you simply prefer professional
assurance, a professional EP Henry paver installation by Nix can ensure a flawless
result. Experts have the equipment, experience, and knowledge to steer complex
installations and guarantee the longevity of your investment.
Frequently Asked Questions about Your New Paver Surface
Even after a successful installation, you might have questions about the ongoing care and characteristics of your new EP Henry paver surface. Here are answers to some common inquiries.
Will weeds grow between my pavers?
This is a common concern for many homeowners. While EP Henry pavers themselves are weed-resistant, weeds can still grow in the joints between them. This typically happens when airborne seeds (from nearby trees, plants, or even carried by wind) land in the sand-filled joints and germinate. Over time, organic debris can also accumulate in the joints, providing a medium for weed growth.
However, the good news is that this can be largely prevented or managed. The primary defense is the proper use of polymeric sand. When correctly applied and activated, polymeric sand hardens to create a solid, stable joint that inhibits weed seeds from taking root and makes it difficult for existing weeds to push through. For added protection, some homeowners opt for a joint stabilizing sealer, which penetrates the sand and binds it even further. If a few stubborn weeds do manage to appear, a targeted spot weed killer (like Round-Up™) can be used without damaging the pavers. Regular sweeping and cleaning of your paver surface can also help remove seeds before they have a chance to germinate.
What is the white film (efflorescence) on my new pavers?
If you notice a whitish haze or film on your new EP Henry pavers, don't be alarmed. This is likely efflorescence, a natural and common occurrence in concrete and brick products. It’s not a product defect and will not harm your pavers.
Efflorescence happens when natural salts and minerals within the concrete migrate to the surface as moisture evaporates. These salts then crystallize, forming the visible white film. It’s a temporary phenomenon that usually weathers away over time with exposure to rain and sun. The process can take several weeks or even months depending on environmental conditions. If you prefer to speed up the removal process, there are specialized cleaners designed to safely remove efflorescence from concrete pavers. These cleaners typically contain mild acids that dissolve the salt deposits. Always follow the product instructions carefully and test on an inconspicuous area first. Ensuring proper drainage during installation can also help minimize efflorescence by preventing prolonged moisture exposure.
Can I install EP Henry pavers over an existing concrete patio?
While it is technically possible to lay EP Henry pavers over an existing concrete patio, we generally advise against it as it is not the ideal method for a long-lasting, problem- free installation. There are several significant drawbacks to consider.
Firstly, installing pavers over concrete will significantly raise the grade height of your patio, typically by about 3 inches (1 inch for the sand setting bed plus the 2 3/8-inch paver thickness). This can create problematic thresholds at doorways, steps, or transitions to other areas of your landscape.
Secondly, the pavers will mimic any cracks or movement of the underlying concrete slab. If the concrete cracks or settles due to freeze-thaw movement or other structural issues, your paver surface will also crack or become uneven in the exact same spots. This defeats one of the primary advantages of pavers, which is their flexibility and ability to move independently without cracking.
For these reasons, it is almost always recommended to remove the existing concrete slab and follow the standard EP Henry paver installation guidelines, which involve proper excavation and a compacted stone base. This ensures a stable, flexible, and durable paver system that can withstand environmental stresses and provide decades of enjoyment.

