What is Tuckpointing and Why is it Necessary?
When we talk about maintaining the structural integrity and aesthetic appeal of brick structures, two terms frequently come up: tuckpointing and repointing. While often used interchangeably, understanding the distinction between them is crucial for homeowners. Both processes involve working with the mortar joints that bind bricks together, but their primary objectives and techniques differ.
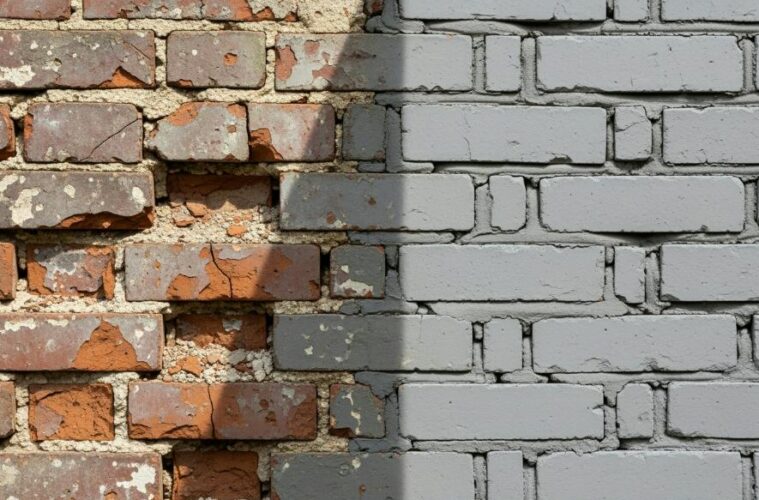
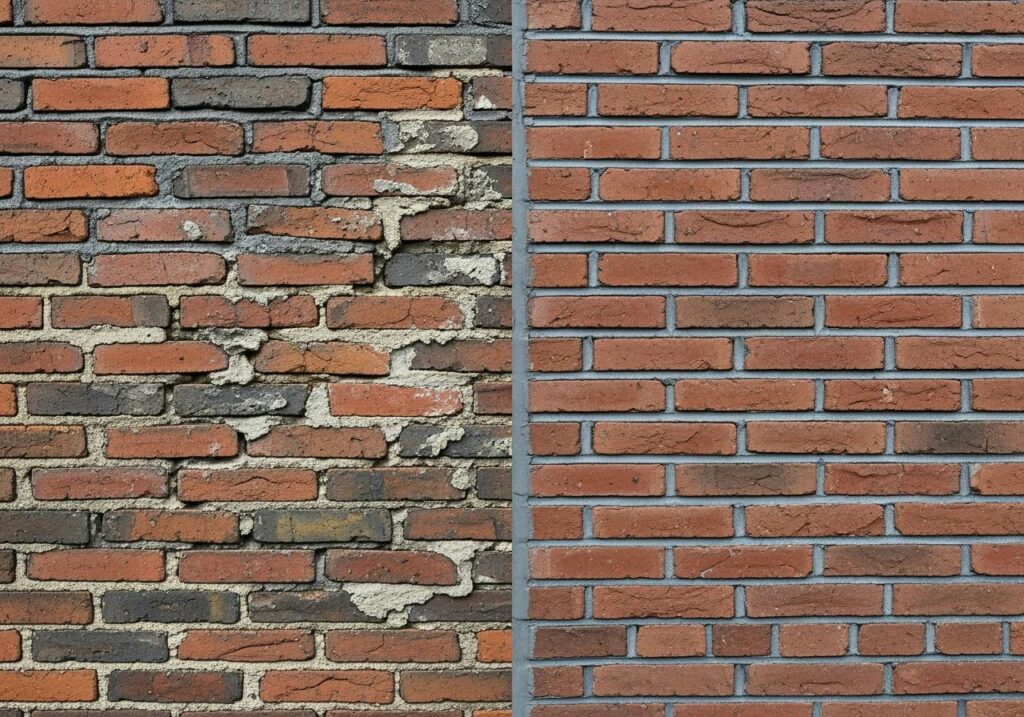
Tuckpointing, in its modern application, is a specialized masonry technique used to repair and refresh deteriorating mortar joints. Its necessity stems from the fact that while bricks themselves can last for centuries, the mortar that holds them together has a much shorter lifespan, typically showing signs of wear within 20-30 years. This deterioration isn’t just an eyesore; it can lead to serious issues. Mortar acts as the first line of defense against moisture. When it cracks or crumbles, water can seep into the masonry, leading to freeze-thaw damage, efflorescence (white, powdery deposits), and even structural instability. By renewing these joints, tuckpointing reinforces structural stability, prevents water damage, and ensures thermal efficiency, ultimately extending the life of your brickwork and enhancing your home’s curb appeal.
Key Differences: Tuckpointing vs. Repointing
The original 18th-century English technique of tuckpointing was primarily for aesthetic improvement. It involved applying two different colors of mortar: a base mortar that matched the bricks, and then a thin, contrasting line (a”fillet”) of putty or fine mortar to create the illusion of very fine, precise joints. This technique was often used to give the appearance of high-quality, perfectly laid bricks, even if the underlying brickwork was less refined.
In contemporary masonry, the terms have evolved and are often a source of confusion.
- Repointing is the more general term for the process of removing old, deteriorated mortar from brick joints and replacing it with new mortar. This is a structural repair, aimed at restoring the integrity of the masonry and preventing moisture penetration. The new mortar is typically matched to the color and composition of the original mortar.
- Tuckpointing, as widely understood today, often refers to the entire process of repointing, but sometimes specifically highlights the aesthetic aspect where a contrasting mortar color is used to create a visually sharp, fine joint line. However, the core function remains the same: to fill in or repair damaged, cracked, or crumbled mortar joints. While modern
tuckpointing primarily serves a critical maintenance role, reinforcing structural stability, it also significantly improves the visual appeal of a building. For professional services that cover both the structural and aesthetic aspects, exploring dedicated Tuckpointing services can provide clarity and expert execution.
Signs Your Brickwork Needs Attention
Recognizing the early signs of mortar deterioration can save homeowners significant repair costs in the long run. Timely repair of mortar joints is crucial to prevent water from causing significant problems to the entire masonry structure. We look for several key indicators:
- Crumbling Mortar: If the mortar between your bricks is soft, powdery, or easily crumbles when touched, it’s a clear sign of deterioration.
- Hairline Cracks: Small, thin cracks in the mortar joints can be entry points for water.
- Gaps Between Bricks and Mortar: When the mortar pulls away from the bricks, creating visible gaps, it compromises the structural integrity and allows moisture ingress.
- Spalling: This refers to the flaking, peeling, or crumbling of the brick face itself. It’s often a symptom of water penetrating the masonry, freezing, and expanding, which damages the brick.
- Damp Interior Walls: Persistent dampness or water stains on interior walls adjacent to brickwork can indicate water penetration through compromised mortar joints.
- Efflorescence: White, powdery deposits on the brick surface, often appearing after rain, are a sign that water is moving through the masonry, dissolving salts, and depositing them on the exterior as it evaporates.
If you notice any of these signs, especially erosion over 6 mm or significant crumbling, it’s time to consider professional masonry repair. Acting on the first sign of mortar joint issues is critical to prevent damage from expanding and potentially requiring a full rebuild.
How Much Does It Cost to Tuckpoint 30 Bricks?
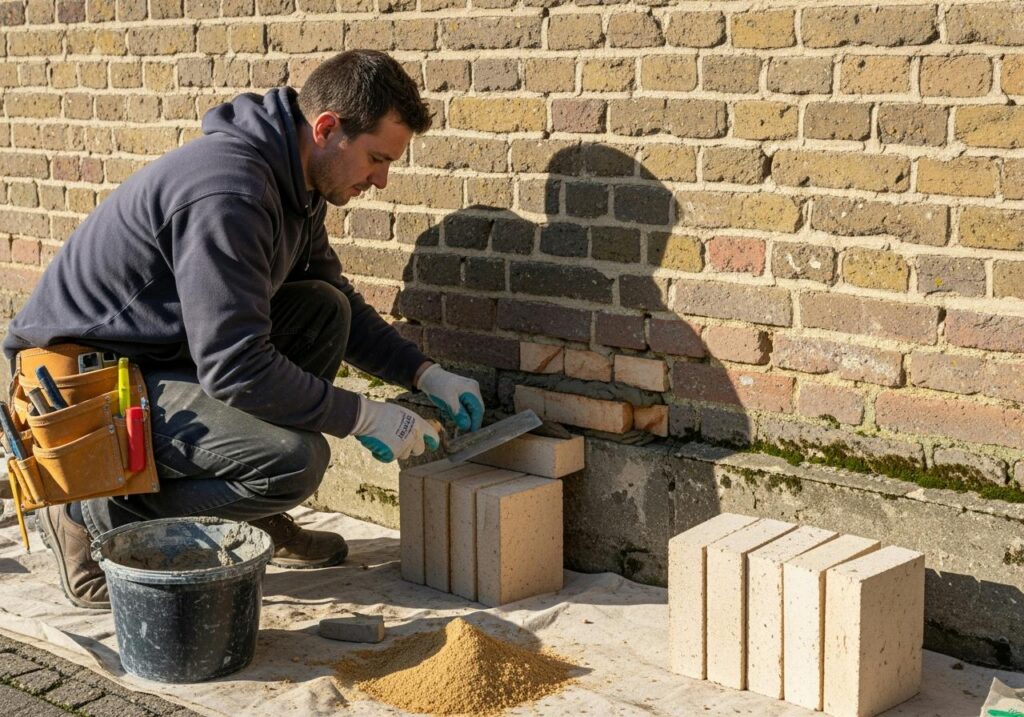
For a small patch repair involving around 30 bricks, you’re most likely to encounter a contractor’s minimum job fee. This fee covers the cost of mobilization, equipment setup, travel time, and the basic labor required to perform the repair, regardless of how few bricks are involved. Most brick masons charge a minimum job fee ranging from $200 to $1,500, depending on the type of project and the contractor’s location and reputation. This minimum charge ensures that even small jobs are financially viable for the
professional.
While the average tuckpointing cost is $5 to $25 per square foot, applying this directly to a tiny area like 30 bricks can be misleading. For instance, if a standard brick is 2.25 inches by 8 inches, 30 bricks would cover a very small square footage, perhaps less than 5 square feet. At $25 per square foot, this would only be $125, which wouldn’t cover a professional’s time and overhead. Therefore, the minimum fee will almost always apply to such a small task. For specific estimates and to understand the typical 30-brick tuckpointing cost, it’s always best to consult with local masonry professionals.
Understanding Contractor Minimum Fees
- Contractor minimum fees are a standard practice in many skilled trades, including masonry. They account for the fixed costs associated with taking on any job, no matter how small. These typically include:
- Service Call Charge: A base fee for the contractor to come to your property, assess the work, and provide a quote.
- Travel Time: The time and fuel spent traveling to and from your location
- Setup Cost: The time and effort required to set up tools, equipment, and protective measures at the job site.
- Basic Labor Hours: Even a quick repair takes time for a skilled mason, including preparation, execution, and cleanup.
For small jobs, the minimum fee ensures the contractor can cover their operational expenses and make a reasonable profit. This is why a repair involving just 30 bricks, which might take only an hour or two of actual work, could still fall within the $200-$500 range, or even higher, depending on the complexity and location.
Estimating the Cost to Tuckpoint a 30-Brick
To estimate the cost for a small section of 30 bricks, we primarily consider labor hours and a nominal material cost, all framed within the contractor's minimum fee structure. Masons charge $50 to $125 per hour for repointing or tuckpointing. While the actual work on 30 bricks might only take a fraction of an hour for an experienced professional, the total time billed will include the aforementioned setup and travel.
Let’s consider a practical scenario:
- Preparation and Setup: 1-2 hours
- Mortar Removal and Application (30 bricks): 0.5 – 1 hour (depending on joint conditionand accessibility)
- Cleanup: 0.5 hours
Total estimated time on site could be 2-3.5 hours. At an average hourly rate of $75, this would be $150-$262.50. Add to this the material cost (which is minimal for such a small area, perhaps $20-$50 for mortar and supplies) and overhead, and you quickly approach or exceed the lower end of the $200-$500 minimum fee range. For a precise assessment of your specific needs, we recommend reaching out to Masonry services, which can provide a detailed quote.
It’s important to ask for a project quote rather than an hourly billing for small jobs. A project quote provides a clear, upfront cost, avoiding surprises—contractors factor in their minimums and estimated time to give you a single price.
Key Factors That Influence Tuckpointing Prices
The average cost for tuckpointing generally ranges from $5 to $25 per square foot.
However, this broad range accounts for a multitude of variables that can push prices to the higher end.
[TABLE] Comparing Tuckpointing Costs by Project Scale
To illustrate how costs can vary, let’s look at typical ranges for different project scales, keeping in mind that these are estimates and can fluctuate based on the factors discussed below.
Project Scale Description Estimated Cost Range (National Average)
Small Patch (under 10 sq. ft.) Isolated areas, often subject to minimum fees $200 -$750 (minimum job fee). Chimney Repair (stack only): Repairing mortar on an
accessible chimney stack $500 – $2,500.
Full Wall (100 sq. ft.) A section of a brick wall, accessible and straightforward $500 -$2,500
Whole House Exterior Comprehensive tuckpointing of an entire brick home $5,000 -$50,000+ It’s worth noting that prices can be affected by regional differences in labor costs, with areas having a higher cost of living typically seeing higher prices. For more localized information, exploring resources like Angi’s cost guides can be helpful, such as their article on How Much Does Tuckpointing Cost? (2025 Guide).
The Impact of Mortar Choice and Accessibility
Beyond the sheer size of the project, several specific elements significantly influence the final price:
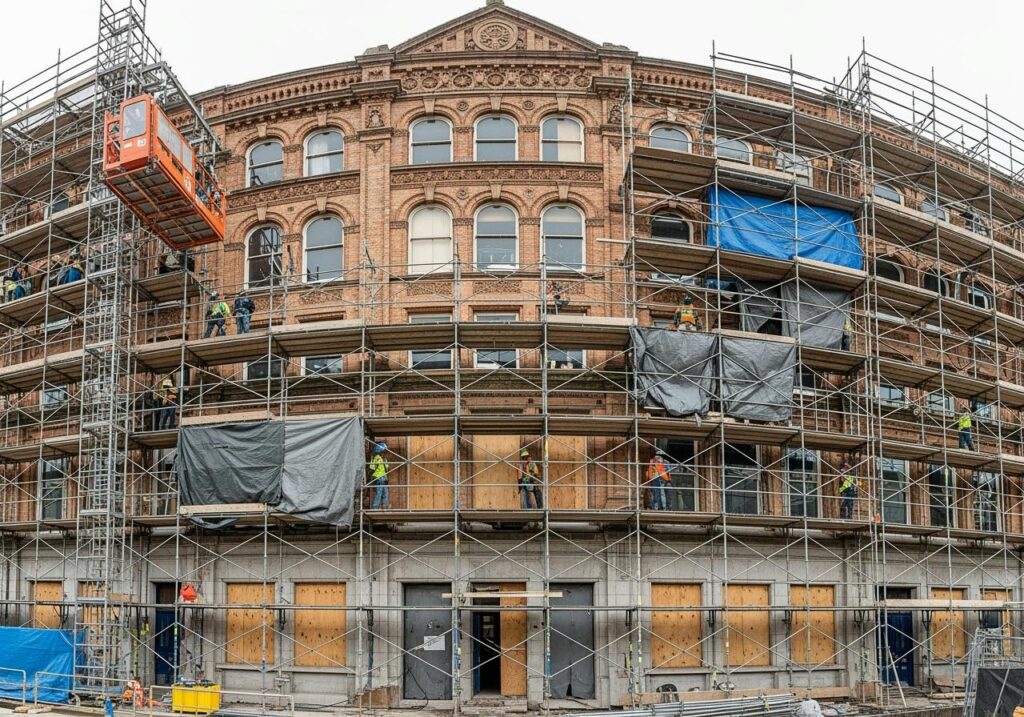
- Accessibility: This is often one of the biggest cost drivers. Ground-level work is the least expensive. However, if the area requires ladders, scaffolding, or specialized equipment to reach (e.g., upper stories, chimneys, tight spaces), the labor costs will increase significantly. Walls above 8 feet often incur a premium of 20% to 40% due to the added safety measures and time required for working at height.
- Mortar Type and Matching: Not all mortar is created equal. Older homes, particularly those built before the 1930s, often used softer, lime-based mortar. Modern Portland cement-based mortars are much harder. Using the wrong type of mortar can cause more damage to older, softer bricks. Matching the original mortar’s strength, composition, color, and texture is crucial, especially for historic properties. This may require a mortar analysis, which can add $100 to $500 to the cost. Custom color matching or the use of specialized lime-based mortars can also increase material costs. For guidance on historic preservation standards, resources like the U.S. Secretary of the Interior’s Standards for the Treatment of Historic Properties are invaluable.
- Extent of Damage: The worse the condition of the existing mortar, the more time and effort it will take to remove it. Deeply deteriorated joints, or those with significant cracks or missing sections, require more meticulous work. If bricks themselves are damaged (spalled, cracked, or loose), they may need to be repaired or replaced before tuckpointing can begin, adding to the overall expense.
- Geographic Location: Labor rates and material costs vary by region and even within different areas of the same state. Urban areas typically have higher costs than rural ones.
- Historic Preservation Requirements: For landmark buildings, strict guidelines often dictate the type of mortar, tools, and techniques that can be used. This can increase complexity and cost, as specialized masons and materials may be required. Adhering to these standards is vital for preserving the building's historical integrity.
Considering these factors, it becomes clear why a simple “per brick” estimate isn’t feasible. A comprehensive quote from a qualified mason will account for all these variables to provide an accurate project cost. When you’re ready to discuss your specific project, don’t hesitate to Contact Us for a detailed assessment.
DIY vs. Hiring a Professional for Small Repairs
DIY Feasibility:
- Skill Level: Tuckpointing, even for a small area, requires precision, patience, and a good understanding of mortar mixing and application techniques. Improperly mixed mortar can lead to premature failure, and poor application can look messy or, worse, compromise the integrity of the wall.
- Time Commitment: Even a small patch can take longer than anticipated for an inexperienced DIYer, especially when factoring in preparation, mortar removal, mixing, application, and cleanup.
- Potential for Damage: Using the wrong tools, incorrect mortar, or improper techniques can cause more damage to the bricks or the surrounding masonry, leading to more costly professional repairs down the line.
- Long-Term Value: A professional job, even for a small area, ensures proper material matching and application, leading to a durable repair that lasts for decades. A DIY repair, if not done correctly, might need to be redone much sooner.
While the DIY route might seem more cost-effective initially, the potential for mistakes makes it a task best left to experienced hands, especially for anything beyond the most superficial, non-structural cosmetic fixes. As many experts suggest, homeowners usually prefer to outsource this labor-intensive job to a pro.
[LIST] of Tools and Materials for DIY Tuckpointing
If you decide to proceed with a DIY tuckpointing project for a very small, non-critical area, here’s a basic list of tools and materials you would need:
- Joint Raker or Grinder: To remove old, deteriorated mortar. For small areas, a hand joint raker is safer than an electric grinder.
- Cold Chisel and Mason’s Hammer: For stubborn mortar removal.
- Stiff Wire Brush: To clean out debris from the joints after removal.
- Mortar Hawk: A flat board with a handle, used to hold a small amount of mortar while working.
- Pointing Trowel (or Jointing Tool): Small, specialized trowels designed for pressing mortar into joints and tooling them to the desired finish.
- Mixing Trowel or Hoe: For mixing mortar.
- Mortar Mix: Purchase pre-mixed bags or individual components (cement, lime, sand) if you need to custom-mix. Ensure it's the correct type for your brickwork.
- Water: For mixing mortar and wetting the joints.
- Bucket: For mixing mortar.
- Safety Glasses: Essential to protect your eyes from dust and debris.
- Gloves: To protect your hands from mortar and tools.
- Dust Mask: To avoid inhaling mortar dust.
- Drop Cloths or Plastic Sheeting: To protect surrounding areas from mortar spills.
Even with the right tools, the skill to use them effectively and choose the correct mortar type is paramount.
When to Hire a Pro, Even for a Small Job
- Even for a seemingly small area like 30 bricks, there are specific situations where hiring a professional is not just recommended but essential:
- Structural Cracks: If the mortar deterioration is accompanied by cracks in the bricks themselves, or if the wall shows signs of bowing or shifting, this indicates a deeper structural issue that requires professional assessment and repair.
- Historic Properties: Working on landmark buildings requires specialized knowledge of traditional mortars and techniques to avoid irreversible damage. The U.S. Department of the Interior Office of Historic Preservation sets specific standards that must be followed.
- Matching Unique Mortar: If your existing mortar has a unique color, texture, or composition, a professional can perform a mortar analysis to ensure the new mortar matches perfectly, preserving the aesthetic and structural integrity.
- Lack of Experience or Time: If you’re uncomfortable with masonry work or don’t have the time, a professional will ensure the job is done efficiently and correctly.
Ensuring Longevity: A professionally executed tuckpointing job will typically last 25-30 years, offering peace of mind and long-term value. An improperly done DIY job might fail prematurely, costing more in the long run.
The decision to DIY or hire a pro depends on the homeowner's comfort level, skill, and the nature of the damage. For any concerns about structural integrity or for a guaranteed, long-lasting repair, professional expertise is always the safest bet. You can explore our Gallery of Our Work to see the quality and precision a professional can deliver.
Frequently Asked Questions about Brick Repair
Homeowners often have many questions when facing brick and mortar deterioration. Here, we address some of the most common inquiries.
How often does brickwork require tuckpointing?
Tuckpointing typically lasts between 25 and 30 years. However, this lifespan can vary significantly based on several factors:
- Climate Impact: Areas with harsh weather conditions, such as extreme temperature fluctuations, heavy rainfall, or frequent freeze-thaw cycles, can accelerate mortar deterioration. High-humidity regions may also see a shorter lifespan.
- Original Mortar Quality: The quality of the original mortar and the initial tuckpointing job plays a significant role.
- Exposure: Walls more exposed to the elements (e.g., south-facing walls, chimneys) may require more frequent attention.
Regular visual inspection of your brickwork is the best way to determine when
tuckpointing is needed. Look for the signs of deterioration we discussed earlier, such as crumbling mortar, cracks, or gaps. Addressing issues promptly can help maximize the lifespan of your masonry.
Can you tuckpoint over old, damaged mortar?
No, you generally cannot tuckpoint over old, damaged mortar. For new mortar to bond properly and effectively, the old, deteriorated mortar must be removed. The standard practice is to remove the old mortar to a depth of at least 3/4 inch, or until sound mortar is reached.
Attempting to apply new mortar over deteriorated or loose old mortar will result in a weak bond, leading to premature failure of the repair. The new mortar will sit on top of the old, crumbling material and will not provide the necessary structural support or weather protection. Proper preparation, including thorough cleaning of the joints to remove all dust and debris, is essential for strong adhesion and a long-lasting repair. This meticulous process ensures the longevity and effectiveness of the tuckpointing.
What questions should I ask a mason before getting a quote?
When seeking a quote for tuckpointing, asking the right questions can help you choose a qualified and reliable contractor. We recommend asking the following:
1. Are you licensed, bonded, and insured? This protects you in case of accidents or
damage during the project.
2. Can you provide references or a portfolio of past work? Seeing examples of their masonry work, especially before-and-after photos, can demonstrate their quality and experience.
3. What is your process for matching the new mortar to the existing mortar? A
reputable contractor will discuss mortar analysis, color matching, and composition to ensure a seamless and structurally sound repair.
4. Will you provide a detailed written estimate? The estimate should break down costs for labor, materials, and any potential additional services.
5. What is your cleanup policy? Ensure the quote includes debris removal and site cleanup after the work is complete.
6. Do you offer a warranty on your work? A warranty provides peace of mind regarding the longevity of the repair.
7. How long do you expect the project to take? Get a realistic timeline for completion.
8. How do you handle unexpected issues or additional repairs that may
arise? Understand their communication and billing process for unforeseen circumstances.
9. Are you certified by any masonry organizations (e.g., Mason Contractors
Association of America (MCAA) or National Concrete Masonry Association (NCMA)) or a member of a masonry union? Such affiliations often indicate a commitment to professional standards and ongoing training.
Asking these questions will help you evaluate contractors and ensure you receive a fair price for quality work. For a comprehensive overview of our capabilities and approach to masonry projects, please visit our About Amsterdam Contractor page.
Conclusion
The brick exterior of your home is a significant asset, contributing to its beauty,
durability, and value. Understanding the nuances of masonry repair, particularly
tuckpointing, is an investment in your property’s long-term health. While the phrase “how much does it cost to tuckpoint a 30 bricks” might seem to suggest a simple, small expense, we’ve seen that even minor repairs are subject to professional minimum fees and require careful consideration.
Tuckpointing is more than just a cosmetic fix; it’s a critical maintenance task that protects your home from water damage, preserves its structural integrity, and improves its curb appeal. Recognizing the signs of mortar deterioration and acting promptly can prevent minor issues from escalating into costly, extensive repairs.
While DIY tuckpointing might be tempting for the smallest, non-structural blemishes, the precision, skill, and knowledge of mortar types required often make it a task best left to professionals. Hiring an experienced mason ensures that the job is done correctly, using appropriate materials and techniques, leading to a durable repair that stands the test of time.
By understanding how costs are calculated, the factors that influence pricing, and what questions to ask a contractor, you empower yourself to make informed decisions for your home. Investing in quality tuckpointing is not merely an expense; it’s a proactive measure that safeguards your property, maintains its value, and provides peace of mind for decades to come.
For all your masonry needs, from small repairs to full facade restorations, we encourage you to learn more about our comprehensive services and find out how we can help protect and improve your home.
Ready to ensure the longevity and beauty of your brickwork?
Get a professional assessment and quote for your masonry project today! ,
